Install GLPI + Fusion Inventory Server plugin on freeBSD with php, Apache and MySQL
Contents
1. Introduction
G.L.P.I stands for Gestion Libre de Parc Informatique, it's a free IT and Assets Management software compatible with ITIL. Natively it manages inventories, tickets, demands, changes, licenses, budgets...It's plugins ecosystem allows you to extend the features list with i.e. automatic inventories, software deployment, network cartography, reports, handle assets that are not IT...
The Fusion inventory server plugin for GLPI collects and updates software/hardware components sent by agents (installed directly on the machines) or through "network" inventories, it's also capable of software deployment.
This tutorial includes the installation of both.
2. Tested
2017/07/17
FreeBSD |
11.0 |
Apache |
2.4 |
MySQL |
5.6 |
PHP |
5.6 |
GLPI |
9.1.2 |
Fusion Inventory plugin |
9.1.1.1 (9.1+1.1) |
3. Preparations
Topics |
Values |
glpi database user |
glpi_db_user |
glpi database user password |
glpi_db_user_password |
glpi database |
glpi |
your server hostname |
your_hostname |
4. Install FreeBSD
Standard installation of freeBSD
5. Install Apache
Install the binary package
# pkg install apache24
Make sure that Apache will start automatically at boot
# sysrc apache24_enable="YES"
6. Install MySQL server
Install MySQL server 5.6
# pkg install mysql56-server
Note: the package will also install the mysql client. You can check that by searching in the installed packages and filtering on the word "sql" with this command pkg info | grep sql
Make sure that MySQL server will start at boot
# sysrc mysql_enable="YES"
Start MySQL server
# service mysql-server start
7. Secure the default MySQL configuration
(Source) Assign a password to the MySQL root account (replace host_name and new_password with yours)
 # mysql -u root
 # mysql> SET PASSWORD FOR 'root'@'localhost' = PASSWORD('new_password');
 # mysql> SET PASSWORD FOR 'root'@'127.0.0.1' = PASSWORD('new_password');
 # mysql> SET PASSWORD FOR 'root'@'::1' = PASSWORD('new_password');
 # mysql> SET PASSWORD FOR 'root'@'host_name' = PASSWORD('new_password');
Here's an alternative method# mysql -u root # mysql> UPDATE mysql.user SET Password = PASSWORD('new_password') -> WHERE User = 'root'; # mysql> FLUSH PRIVILEGES;
Remove anonymous accounts.
 # mysql -u root -p
    Enter password: (enter root password here)
 # mysql> DROP USER ''@'localhost';
 # mysql> DROP USER ''@'host_name';
Remove the test database that exists by default.
 # mysql -u root -p
    Enter password: (enter root password here)
 # mysql> DROP DATABASE test;
8. Prepare MySQL for GLPI
Note : when you have mysql> in front of the lines, this means that you are logged into the mysql server that has it's own syntax.
Create a database for glpi
 # mysql -u root -p
 # mysql> CREATE DATABASE glpi;
Create a user dedicated to the administration of the glpi database, replace glpi_db_user and glpi_db_password with yours
# mysql> CREATE USER 'glpi_db_user'@'localhost' IDENTIFIED BY 'glpi_db_user_password';
Give that user the permissions to access the glpi database, replace glpi_db_user with yours
 # mysql> GRANT ALL ON glpi.* TO 'glpi_db_user'@'localhost'
 # mysql> FLUSH PRIVILEGES;
Usefull commands for verifications :
- List users :
# mysql> SELECT User, Host, Password FROM mysql.user;
note : a user is in fact a couple of [username@ip_from_where_it_connects], you should see a password for each combinations.
# mysql> show databases;
# mysql> DROP USER 'username'@'something';
9. Install PHP
Install php engine and the php mod for Apache.
# pkg install php56 mod_php56
10. Install PHP extensions
There is for now a bit of confusion around what extensions are needed or not : the port, the github page and some information gathered from the dev team don't match at 100%
extension name |
glpi github |
the package |
this howto |
ctype |
no |
yes |
yes |
curl |
yes |
no |
yes |
exif |
no |
no |
yes |
domxml |
yes |
no |
yes |
fileinfo |
no |
yes |
yes |
filter |
no |
yes |
yes |
gd |
yes |
yes |
yes |
imap |
yes |
yes |
yes |
json |
yes |
yes |
yes |
ldap |
yes |
yes |
yes |
mbstring |
yes |
yes |
yes |
mysql |
no |
no |
yes |
mysqli |
no |
yes |
yes |
openssl |
yes |
no |
yes |
session |
no |
yes |
yes |
simplexml |
no |
yes |
yes |
wddx |
no |
yes |
yes |
xml |
no |
yes |
yes |
xmlrpc |
no |
yes |
yes |
zlib |
no |
yes |
yes |
As a workaround, here's the command to install the php extensions (this topic needs an exchange with the glpi dev team)
# pkg install php56-ctype php56-curl php56-exif php56-fileinfo php56-filter php56-gd php56-imap php56-json php56-ldap php56-mbstring php56-mysql php56-mysqli php56-session php56-simplexml php56-wddx php56-xml php56-xmlrpc php56-zlib
11. Install GLPI
Install the binary package
# pkg install glpi
note : the website will be stored by default in /usr/local/www/glpi
Fix file permissions - NOT CORRECT YET, only files and config need www access - to RECHECK
# chown -R www:www /usr/local/www
12. Configure apache
(Source)
12.1. Basic configuration
Open Apache configuration file
# ee /usr/local/etc/apache24/httpd.conf
Change the server administrator email address : find this line and replace you@example.com with yours
ServerAdmin you@example.com
Change the server name : add a line in this format and replace your_server_name_here with your domain name or the hostname of the server if you keep the use local
ServerName your_server_name_here:80
Save and exit : press the [esc] key (that makes the menu appear), exit and save
Other important defaults
The server root is configured with this line ServerRoot "/usr/local"
The documents will be served from here DocumentRoot "/usr/local/www/apache24/data"
12.2. Verify that Apache includes configuration files automatically
By default, Apache should automatically include all configurations files that are located in the folder Includes
Verify Apache's configuration file
# less /usr/local/etc/apache24/httpd.conf | grep Include
You should find this line uncommented Include etc/apache24/Includes/*.conf
If not, add it using this command or edit the configuration file using ee /usr/local/etc/apache24/httpd.conf
cat 'Include etc/apache24/Includes/*.conf' >> /usr/local/etc/apache24/httpd.conf
12.3. Add the PHP module configuration
Edit a separate configuration file for the php module
# ee /usr/local/etc/apache24/Includes/php.conf
to setup index.php as a default directory index, add these lines<IfModule dir_module> DirectoryIndex index.php index.html
     <FilesMatch "\.php$">
        SetHandler application/x-httpd-php
     </FilesMatch>
     <FilesMatch "\.phps$">
        SetHandler application/x-httpd-php-source
     </FilesMatch>
  </IfModule>
Save : press the [esc] key, save and exit.
12.4. Add the GLPI configuration
Create a separate configuration file for GLPI
ee /usr/local/etc/apache24/Includes/glpi.conf
- add these lines
  Alias /glpi /usr/local/www/glpi
  <Directory /usr/local/www/glpi>
     AllowOverride Options Fileinfo
     Options Indexes FollowSymLinks
     Require all granted
     DirectoryIndex index.php
  </Directory>
- add these lines
Save : press the [esc] key, save and exit.
12.5. Verify and start Apache
Verify the configuration
service apache24 configtest
Start Apache
service apache24 start
13. Configure GLPI
This will be done inside GLPI, to access it use this url http://your_server_ip/glpi
Select your language and click "OK"
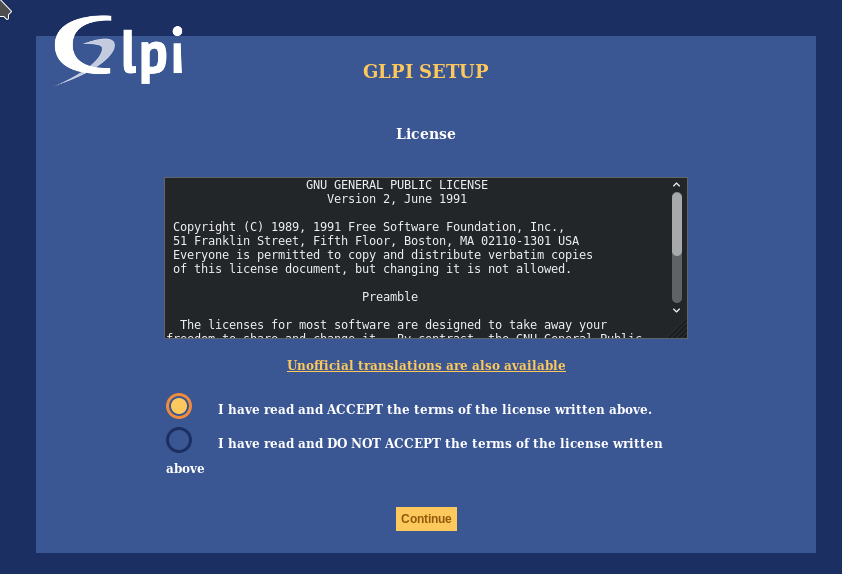
Accept the license terms
The GLPI setup will do a self check
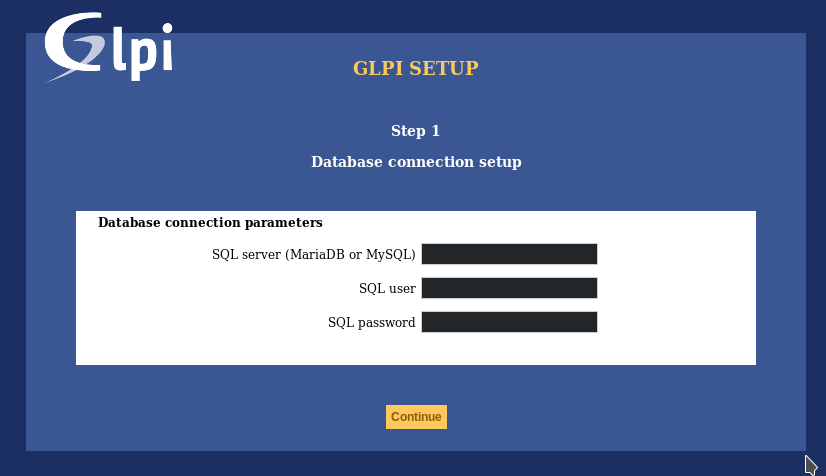
Database connection setup : enter the credentials for your glpi database user
SQL server (MariaDB or MySQL)
localhost
SQL user
glpi_db_user
SQL password
glpi_db_user_password

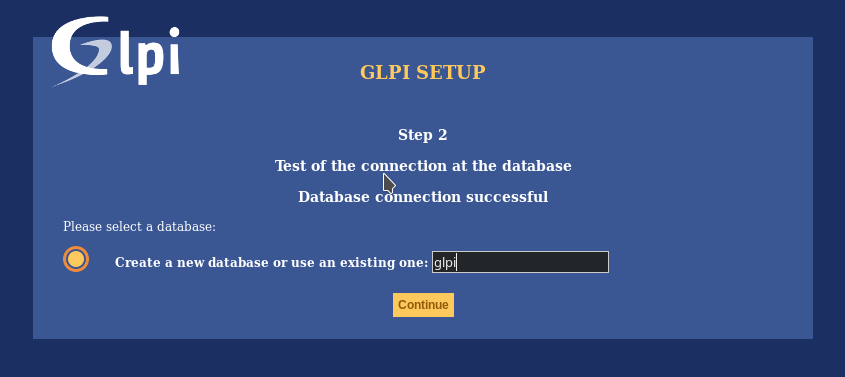
Create a database or use an existing one -> in this tutorial we will use the database we just created, by default it's glpi
Login to GLPI (http://your_server_ip/glpi) with the default super administrator user/password : glpi/glpi
GLPI reminds you to secure the installation
You should change the passwords for the default users glpi, post-only, tech, normal in the administration tab http://your_ip_address/glpi/front/user.php
You should delete the installation file installation_directory/install/install.php
# rm /usr/local/www/glpi/install/install.php
14. Setup the Fusion Inventory Server plugin
14.1. Install
Go into the GLPI's plugin directory
# cd /usr/loca/www/glpi/plugins
Download the tar file of the release from github
# fetch https://github.com/fusioninventory/fusioninventory-for-glpi/releases/download/glpi9.1%2B1.1/fusioninventory-for-glpi_9.1.1.1.tar.gz
Note : you can check what version are available here
Unpack the plugin
# tar -xvf fusioninventory-for-glpi_9.1.1.1.tar.gz
When it's done, you can remove the original tar file
# rm fusioninventory-for-glpi_9.1.1.1.tar.gz
14.2. Configure
In the GUI, go in the "Administration/Plugins" section (http://your_ip_address/glpi/front/plugin.php) where you should see the fusion inventory server plugin in the list, click on "install"
Now you have to enable it by clicking on "enable" (http://your_ip_address/glpi/front/plugin.php)
14.3. Fix the "GLPI cron not running" error message
With the plugin enabled, a new menu item "plugins" appeared in the main menu bar on the top, inside of it you can see an error message "GLPI cron not running, see documentation". To fix that, you have to create a cronjob that will run the GLPI cron every minutes. (Source)
Edit the crontab for the user www
# crontab -u www -e
This will launch the vi text editor
Press [i] to go in insert mode Enter the content of this line
* * * * * /usr/local/bin/php /usr/local/www/glpi/front/cron.php &>/dev/null
Press the [Esc] key to go back in normal mode
Press [:] to go in command mode
To save, enter wq (for Write and Quit) and press the [enter] key
15. Sources
Apache HTTP server on the FreeBSD handbook
Securing the Initial MySQL Accounts
fix cron for GLPI and for Fusion Inventory
16. To do
- A version of this tutorial with with FreeBSD nginx mangoDB php
add HTTPS to the web server -> should be a separate tutorial for apache
17. Credits
Original howto written by David Stievenard : Thanks for the dev. team for this great piece of software and for their help and patience at Freenode#glpi and to ddurieux in particular.


