Working with Xilinx FPGAs on FreeBSD
This page documents steps necessary to get Xilinx ISE 11.1 IDE running on FreeBSD 9 system. Please contact WojciechKoszek if information found here didn't let you to get Xilinx FPGA toolkit working, are inappropriate or obsolete.
Note that the newer Xilinx Vivado Design Suite uses Java, including the xsetup installer. Unfortunately I (RebeccaCran) haven't been able to get it to work on FreeBSD 11.1 since java (OpenJRE 8) segfaults as the installer starts.
Introduction to free Xilinx ISE environment
ISE WebPack is a free variant of ISE Design Suite supporting most popular FPGA chips manufactured by Xilinx. This version should be enough for you in most of the cases and its use will be documented here.
Short theory behind the ISE and FreeBSD relationship -- Xilinx delivers ISE binaries compiled for Linux machines. In FreeBSD, we're able to get Linux binaries to work with a help of so called Linuxolator -- Linux emulation layer present in the kernel and within the base system.
Below, I present steps necessary to get your system prepared to execute Linux binaries. Later, I show how to unpack, run and install ISE environment step by step. I outline tasks necessary to get FPGAs programmed. At the end, procedure of running couple of ISE tools is documented.
System preparation
Linux emulation layer can either be enabled permanently in your kernel configuration file, or be enabled by loading linux.ko kernel module:
# kldload linux.ko
Typical solution is to enable it through /boot/loader.conf, to make it work just after system startup:
linux_load="YES"
You can verify whether the module has been properly loaded by inspecting kldstat output:
              # kldstat | grep linux
               2    2 0xc0aa1000 2e988    linux.ko
ISE installation tools require an access to the emulated Linux process file system. You can mount it with a command:
mount -t linprocfs linprocfs /compat/linux/proc
You can verify whether the file system got properly mounted by inspecting mount output:
              # mount | grep linprocfs
              linprocfs on /compat/linux/proc (linprocfs, local)
Kernel-related part of Linux emulation enabling procedure should be finished now. We still have to install Linux libraries necessary by xsetup, installation program.
This tutorial is being written with new, fresh FreeBSD 9-CURRENT system running next to me. Apart from X11 and ViM, nothing has been installed. Installer and command-line utilities as well as "ise" -- graphical frontend require couple of ports installed:
              (cd /usr/ports/emulators/linux_base-f10 && make install)
              (cd /usr/ports/textproc/linux-f10-expat && make install)
              (cd /usr/ports/x11-fonts/linux-f10-fontconfig && make install)
              (cd /usr/ports/graphics/linux-f10-png && make install)
              (cd /usr/ports/x11/linux-f10-xorg-libs && make install)
After installation, this is how /var/db/pkg look like:
              %ls /var/db/pkg/ | grep linux
              drwxr-xr-x    2 root  wheel   512 Jan  9 15:48 linux-f10-expat-2.0.1
              drwxr-xr-x    2 root  wheel   512 Jan  9 15:48 linux-f10-fontconfig-2.6.0
              drwxr-xr-x    2 root  wheel   512 Jan 12 02:09 linux-f10-png-1.2.37
              drwxr-xr-x    2 root  wheel   512 Jan  9 15:48 linux-f10-xorg-libs-7.4_1
              drwxr-xr-x    2 root  wheel   512 Jan  9 15:47 linux_base-f10-10_2
You can see full list of packages installed at a time of writing this tutorial here (while most of ports has been installed as a part of ImageMagic installation, so that obtaining screenshots could be possible):
[http://freebsd.czest.pl/~wkoszek/fpga/ports_for_xilinx_ise.txt]
Moreover, you are supposed to create dynamic link to /compat/linux/opt in your main root directory:
# ln -s /compat/linux/opt /opt
This will prevent you from running into "not enough disk space warning".
Basically, this is the end of Linuxolator preparation. Now, we're going to start installation.
Obtaining Xilinx ISE environment
In order to obtain Xilinx ISE WebPack, you must visit this site:
In order to proceed, one needs to have an account on the Xilinx page. After successful account creation, you have to log in and download WebPack package. Successful process should result in having .tar file on your disk:
             wkoszek@laptop:/media/Multimedia$ ls Xilinx_11.1_!WebPack_SFD.tar
             -rw-r--r--  1 wkoszek  wkoszek  2868316160  5 paź 17:04 Xilinx_11.1_!WebPack_SFD.tar
There were numerous of reports about inability to install Xilinx ISE 11.1 on multiple systems, including Microsoft Windows and GNU/Linux. While writing this tutorial, several problems appeared as well. Most problems come from inappropriate archive file, which may get destroyed due to connection interruption. This is checksum of the correct file:
             # md5 /home/wkoszek/Xilinx_11.1_!WebPack_SFD.tar
             MD5 (/home/wkoszek/Xilinx_11.1_!WebPack_SFD.tar) = 42ce70bd3f78e68295175db2441c8b3a
             # sha1 /home/wkoszek/Xilinx_11.1_!WebPack_SFD.tar
             SHA1 (/home/wkoszek/Xilinx_11.1_!WebPack_SFD.tar) =2b57b4fb00914e50d1b0a4d0a49e511ca56e85fb
While you're logged in your profile on Xilinx page, you need to point a mouse pointer to "File size" section in Download manager -- small window will show up and checksum will be presented
Most of the problems come from the lack of checksum verification. Remember about it, since it can save you a lot of time.
Unpack the archive and change the directory:
             # tar xf Xilinx_11.1_!WebPack_SFD.tar
             # cd Xilinx_11.1_!WebPack_SFD
Apart from xsetup, nice xinfo program is available for verifying, that we can actually start X11 program in emulation, and we can observe how our configuration actually look like:
# ./bin/lin/xinfo
Here's the exported information about my reference system: [http://freebsd.czest.pl/~wkoszek/fpga/xinfo_ref9.txt]
Installation procedure
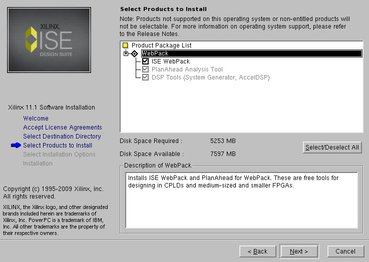
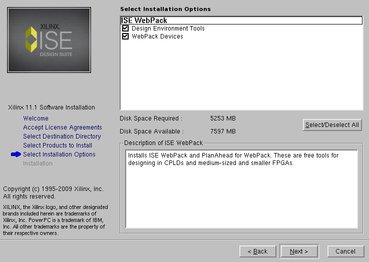
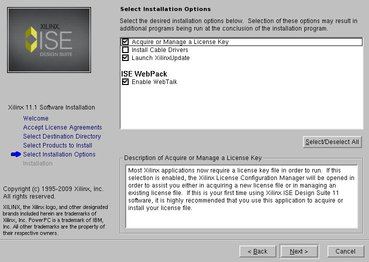
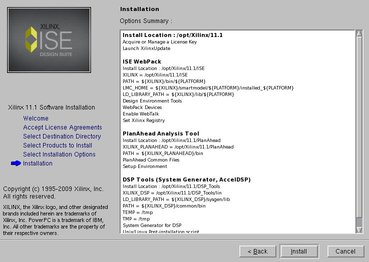
Having system and libraries prepared should let us to get the installer running:
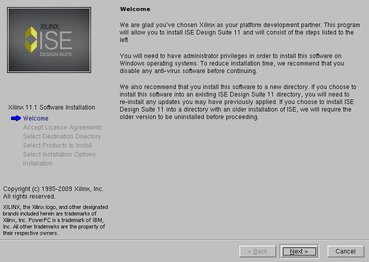
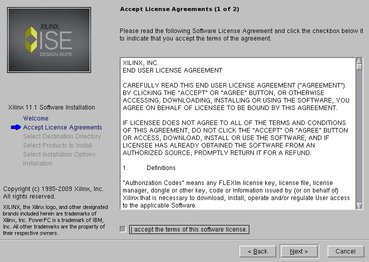
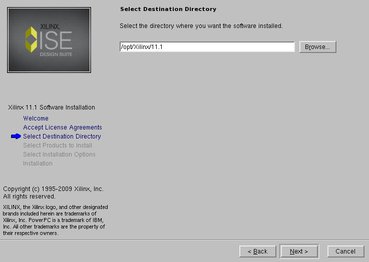
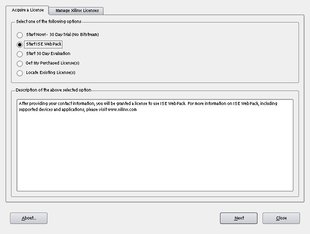
# ./bin/lin/xsetup
And basically, ISE installation should be ready.
In order to let you to work with Xilinx command line tools, you can use preprepared shell scripts settings32.csh (for CSH) and settings32.sh (for sh-alike shells) living in /compat/linux/opt/Xilinx/11.1. You need to modify a path stating where to find the tools from:
set INSTALL_LOC="/opt/Xilinx/11.1"
to
set INSTALL_LOC="/compat/linux/opt/Xilinx/11.1/"
I've put:
source /compat/linux/opt/Xilinx/11.1/settings32.csh
Into my ~/.cshrc script.
FPGA processor programming
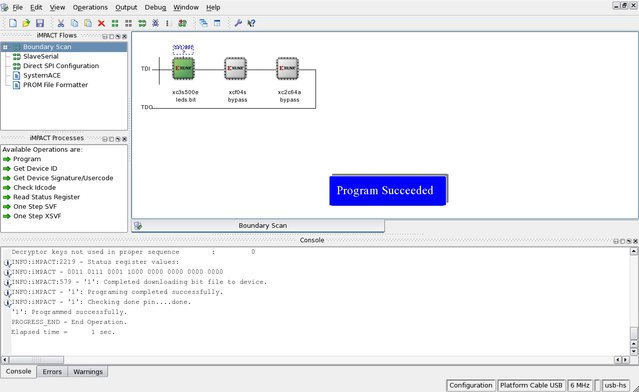
Once you have software tools working it would be quite nice to see that you can actually upload something to your FPGA board and have a proof that it actually works.
Due to the popularity of the FPGA development boards we can distinguish two cases here:
A. You're Xilinx Spartan 3e Starter Kit (S3ESK) user
B. You're other FPGA board user
B isn't documented here (yet), because author doesn't have any bigger standalone FPGA board (yet)
Option A is quite comfortable, since this board is really popular and a lot of people has been dealing with it in UNIXish systems. You just take a bitstream targeted against Spartan 3e500 (fg320 variant) and you stream it through the programming application, that deals with USB communication. Option B will be documented in the future
Anyway, in order to start programming, you have to prepare your JTAG cable..
Xilinx FPGA programming tools: background
Xilinx based its programming functionality on FX2 chip (also known as EZ-USB), nowadays made by Cypress. This chip is a 8051 microcontroller with USB support. It supports reenumeration -- processor implements special kind of protocol that lets a user to submit '51 machine code which is being used to to program microcontroller. Once done, it detaches from the USB bus and attaches back as a different, 'target' device. Together with modularity, some problems exist. You have to have a software for uploading firmware to the chip.
I brought a support for libusb to the latest version of fxload(8) tool. Testing confirmed that I can program it on GNU/Linux and FreeBSD after my changes. Here's a Git command that will let you to synchronize with a code:
git clone http://freebsd.czest.pl/~wkoszek/fpga/fxload-multios.git
You must have gmake on your system to build it -- it's pretty straight forward:
gmake
It should compile cleanly on FreeBSD 8/9. Mail me otherwise. Once you have fxload(8) working, you can reprogram your FX2 chip with correct firmware. File:
/compat/linux/opt/Xilinx/11.1/ISE/bin/lin/xusbdfwu.rules
Has enough information for particular cases. You simply look at usbconfig output:
           wkoszek@laptop:/compat/linux/opt/Xilinx/11.1/ISE/bin/lin# usbconfig
           ugen0.1: <OHCI root HUB nVidia> at usbus0, cfg=0 md=HOST spd=FULL (12Mbps) pwr=ON
           ugen1.1: <EHCI root HUB nVidia> at usbus1, cfg=0 md=HOST spd=HIGH (480Mbps) pwr=ON
           ugen1.2: <USB2.0 Syntek> at usbus1, cfg=0 md=HOST spd=HIGH (480Mbps) pwr=ON
           ugen0.2: <Optical USB Mouse Logitech> at usbus0, cfg=0 md=HOST spd=LOW (1.5Mbps) pwr=ON
           ugen1.3: <product 0x000d vendor 0x03fd> at usbus1, cfg=0 md=HOST spd=HIGH (480Mbps) pwr=ON
As you see, the last line has something in common with following line from xusbdfwu.rules:
BUS=="usb", ACTION=="add", SYSFS{idVendor}=="03fd", SYSFS{idProduct}=="000d", RUN+="/sbin/fxload -v -t fx2 -I /usr/share/xusb_emb.hex -D $TEMPNODE"Finally, we craft a set of command line options:
./fxload -v -t fx2 -I /compat/linux/opt/Xilinx/11.1/ISE/bin/lin/xusb_emb.hex -D vid=0x03fd,pid=0x000d
After successful programming, you should see that USB device detached and that different device should reappear as:
ugen1.3: <XILINX XILINX> at usbus1, cfg=0 md=HOST spd=HIGH (480Mbps) pwr=ON
If you want to check fxload out but you don't have Xilinx ISE installed yet, you have sample firmware for Spartan 3e Starter Kit here:
http://freebsd.czest.pl/~wkoszek/fpga/xusb_emb.hex
Green LED should blink first and get permanently turned on after that. If something else happens, mail me. LED is basically a sign of correct programming.
Programming from Impact (2010-02-x, WIP: skip for now, please)
Starting from 9.2i Alpha release, Xilinx ISE brings native userspace, libusb-based driver for their cables.
it has been proven to be possible to get it to work in FreeBSD 9-CURRENT. We simply compile our libusb on Linux and install it in the Linuxolator. It had to be modified to use our ioctl() commands, but conflict within command space exists. There's an ongoing work related with investigating, what's the best way to bring support for Linux USB in the FreeBSD
note about finding out a firmware for FX2 programmer note about searching through the udev configuration to see which file is the right one
So basically -- not yet.
Before Xilinx started to ship , where was a kernel driver that never worked for anyone, until a reverse engineered driver for GNU/Linux for libusb appeared here: http://rmdir.de/~michael/xilinx/ still needs checking--worth for people with parallel cables
Programming without proprietary tools
Number of "open" programming tools exist. To save you some time, I enlist tools known to me with functionality provided by them:
[1] Probably first tool to program S3ESK out-of-IDE was: http://www.rogerstech.force9.co.uk/xc3sprog/index.html, but you won't be really happy with it unless you use parallel JTAG cable.
[2] Andrew Rogers' work has been extended by "Inisyn Research" by bringing libUSB support. Project is called XUP: http://inisyn.org/src/xup/. It works (needs some hacks for FreeBSD).
[3] Above projects has been consolidated into one big program by Uwe Bonnes. The project is hosted on SourceForge: http://sourceforge.net/projects/xc3sprog/ Compiles and works under FreeBSD.
WARNING: as you see, name "xc3sprog" has been reused number of times; below, "xc3sprog" only refers to the [3] project by Uwe Bonnes. The other two aren't supported, as I believe no further development happens there.
So, in order to have xc3sprog, the best way is to obtain the fresh copy straight from the Subversion:
svn co https://xc3sprog.svn.sourceforge.net/svnroot/xc3sprog xc3sprog
And build it:
          cd xc3sprog/trunk
          mkdir build ; cd build ; cmake .. ; gmake
Quick start with xc3sprog
Default behavior of xc3sprog is to use parallel cable and perform JTAG scan.
Report to Uwe that it's actually wrong nowadays
Anyway, for Xilinx cables, you can do a JTAG boundary scan with:
./xc3sprog -c xpc
Programming:
./xc3sprog -c xpc <file.bit>
For those without Xilinx ISE yet, but willing to test whether everything works, I have provided sample bitstream for Spartan 3E Starter Kit implementing LED ruler
http://freebsd.czest.pl/~wkoszek/fpga/leds.bit
Checksums, just in case:
- MD5: 1b58146048ede072c9bca9815587974f
- SHA1: c675f524ade7bc729772b4850274a10192f95b23
Let me know if something doesn't work for you! I'd like you to explicitly agree to put your name in a "Success stories".
Success stories
Programmers:
- PCIII -- parallel cable III
- XUSB_EMB -- Startan 3E Starter Kit embedded USB JTAG cable
Board |
Cable |
Program |
Command line |
Contributor |
Additional notes |
PCIII |
xc3sprog -d /dev/ppi0 -i BIT file.bit -i MCS file.mcs |
Grzegorz Behrens |
Removing 'Missing power' block is necessary from ioparallel.cpp |
||
S3ESK |
XUSB_EMB |
xc3sprog -c xpc <file.bit> |
wkoszek@ |
Some warnings appear while xc3sprog operation. Reported to the author. |
Before publishing announcement
- bring fxload to mainstream development branch
- prepare a port
- check if ezload provides some more functionality for FX2
devd.conf rules for cables
- mark "quick" steps with red background
- prepare command line options for ise
- prepare tar.gzs for cross-checking
- prepare scripts
- prepare PROM programming example
Ideas
* Explore possibilities of CableServer
Script for Wiki link generation wiki_gen.sh Script for thumbnail generation thumb_gen.sh

